De-installation Instructions of Microsoft's Greek Proofing Tools
Sat, 17/05/2008 - 11:13 — webmaster
-
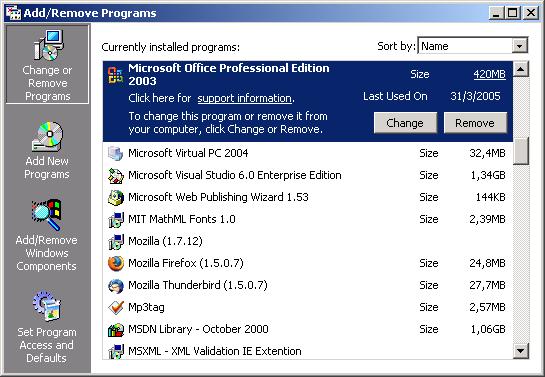
Open Control Panel and choose "Add or Remove Programs". In the window that pops up, you will see a list of
installed programs; there you select the line that corresponds to MS Office, as shown in the picture below. Press
the "Change" button, to alter the installed features of MS Office.

-
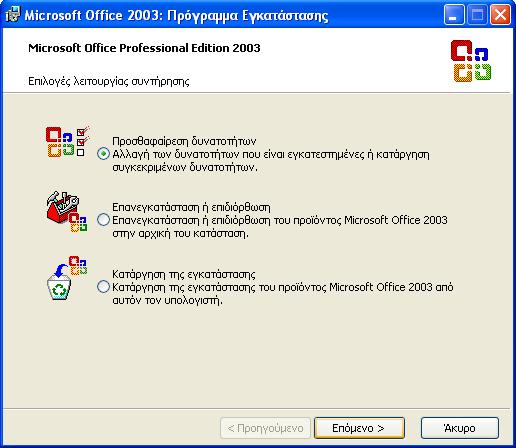
The installer of MS Office will ask you to choose a maintenance option. Please, choose "Add or Remove
Features", as shown in the following picture, and press "Next".

-
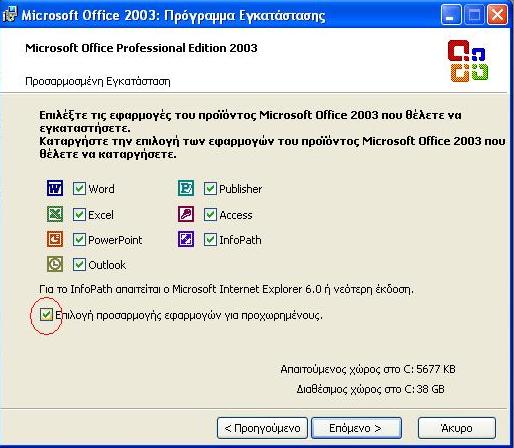
Next, the installer will ask you to choose what to install or uninstall. Choose advanced
customization of applications, as shown with a red circle in the following picture. Leave the other check
boxes intact and press "Next".

-
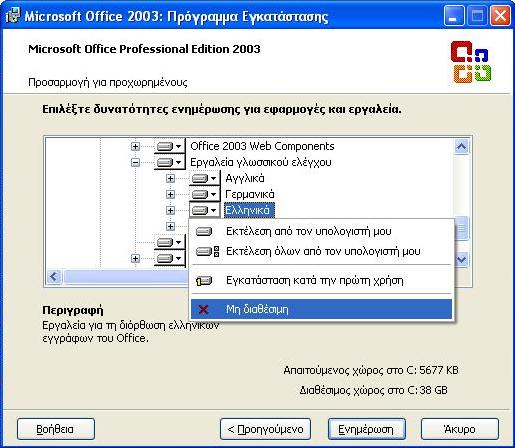
The installer will present all available MS Office components, showing which of them are installed on your
PC and which not. Locate the category "Office Shared Features" and, in it, the category "Proofing Tools". There,
you will find the category "Greek", which includes all Microsoft's Greek proofing tools. Click on the icon in
front of the "Greek" category and in the popup menu select "Not Available", as shown in the following picture.
Then, press the "Update" button of the installer. The installer will remove the Greek proofing tools of
Microsoft from your PC.

- After de-installation, run MS Word. Write Greek words with spelling errors and press F7 to call the Speller. Word will show a message saying that spelling check is complete, without flagging the spelling errors, which means that no speller is available for Greek. You can now proceed with the installation of Neurolingo's Proofing Tools for MS Office.


